Step-by-Step Guide on How to Rehair a Violin Bow
Rehairing a violin bow may not be a simple task, but it can be done with the right tools and enough patience. Whether you’re a professional violinist or a violin hobbyist, you will need to rehair your bow when the horsehair becomes worn out or dirty. By following these steps, you can learn how to rehair a violin bow on your own:
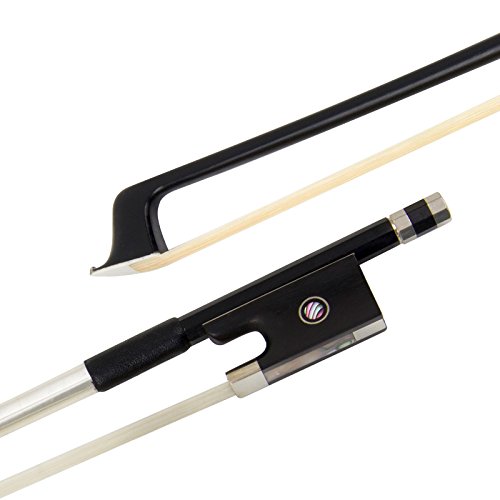
Gather the Necessary Tools and Materials
Before you start the rehairing process, you will need to gather the necessary tools and materials. These may include a block of rosin, a bow rehairing kit (which includes a frog, a screw, and a slide), a straight razor, pliers, a brush, and a cutting tool. Make sure to purchase high-quality horsehair from trusted suppliers.
Remove the Old Hair
Using a straight razor, remove the old horsehair from the bow, and then loosen the screw of the frog using pliers. Remove the frog from the bow, and start cleaning the inside with a brush. Do not forget to clean the screw and slide, too.
Install the New Hair
Take the new bundle of horsehair and tie a knot on one end. Insert the knot into the hole of the frog, and then pull the horsehair through the frog. Attach the slide, and then place the end of the hair into the other hole of the frog. Push the frog back onto the bow, and tighten the screw while holding the bow hair with your fingers.
Prepare the Hair
Using the cutting tool, cut the hair to a length of approximately 28-30 cm. Evenly distribute the hair, and then apply rosin onto each bundle so that the bow can create the desired sound. Use the pliers to adjust the balance, and then turn the screw of the frog until the tension is right.
Rehairing a violin bow can be a delicate process, but it’s necessary to maintain the quality of sound produced by the instrument. By following these easy steps, you can save money and be able to rehair your bow in the comfort of your own home.