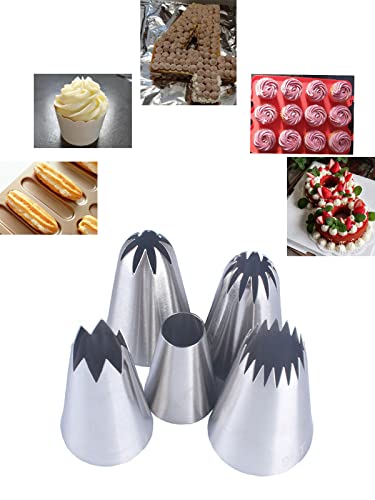
Gather the necessary materials
In order to make homemade pastry nozzles, you will need a few basic materials. These include:
- Aluminum foil
- Scissors
- Pen or pencil
- Tape
- Cookie cutters or stencils
Once you have gathered these materials, you are ready to start making your own pastry nozzles.
Choose the desired shape and size
The first step in making your own homemade pastry nozzle is to decide on the shape and size that you want. This will depend on the type of pastry or icing decoration you wish to create. You can use cookie cutters or stencils as a guide to create the desired shape.
Once you have chosen the shape and size, you can move on to the next step.
Create the nozzle template
Using the pen or pencil, trace the shape of the cookie cutter or stencil onto a piece of aluminum foil. Make sure to press down firmly to create a clear outline.
Next, use the scissors to carefully cut out the shape from the aluminum foil. Take your time to ensure an accurate and clean cut.
Assemble the homemade pastry nozzle
Now that you have your nozzle template, it’s time to assemble your homemade pastry nozzle. Start by wrapping the aluminum foil shape around your finger to create a cone shape.
Hold the shape securely and use tape to seal the edges together. Make sure to wrap the tape tightly to prevent any leakage.
Your homemade pastry nozzle is now ready to use!
Experiment and have fun
With your homemade pastry nozzle, you can now unleash your creativity and experiment with different designs and decorations. Whether you are icing cakes, filling pastries, or creating intricate designs, the possibilities are endless.
Remember to have fun and enjoy the process of creating your own homemade pastry nozzles. It’s a great way to personalize your baked goods and impress your friends and family.