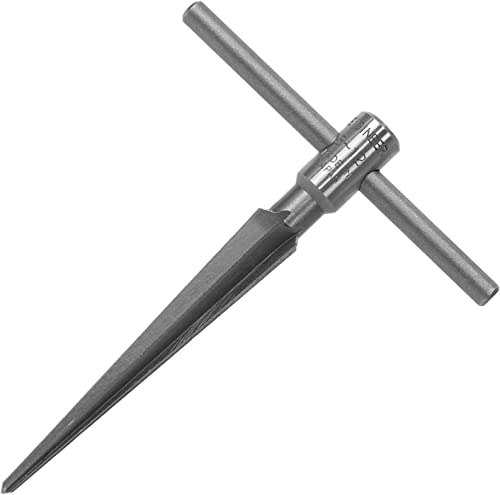
Maintaining and Sharpening a Reamer
Reamers are important tools used in machining and woodworking to create precise holes. Regular maintenance and sharpening of a reamer are essential for achieving accurate and clean cuts. By following some simple steps, you can maintain and sharpen your reamer and prolong its lifespan.
Step 1: Proper Cleaning and Lubrication
The first step in maintaining a reamer is to clean it thoroughly after each use. Use a wire brush or a soft cloth to remove any debris or chips that may have accumulated on the cutting edges. Make sure to inspect the reamer for any signs of damage, such as chips or dull edges.
After cleaning, it’s important to lubricate the reamer before storing it. Apply a thin layer of cutting oil or lubricant to the cutting edges to prevent rust and corrosion. This will also help to keep the reamer sharp for longer periods of time.
Step 2: Regular Inspections
To maintain a reamer in optimal condition, it is important to regularly inspect it for any signs of wear or damage. Check the cutting edges for any chips or nicks that may affect the performance of the reamer. If you notice any damage, it’s recommended to replace the reamer or have it professionally resharpened.
In addition to inspecting the cutting edges, also check the shank of the reamer for any signs of wear or bending. A damaged shank can affect the stability and accuracy of the reamer, so it’s important to address any issues promptly.
Step 3: Sharpening the Reamer
Over time, a reamer will become dull and require sharpening. While reamers are typically sharpened by professionals using specialized equipment, you can perform basic sharpening at home with a few tools.
The first step in sharpening a reamer is to secure it in a vise or a sharpening jig to prevent it from moving during the process. Using a fine-grit sharpening stone or a diamond file, carefully restore the cutting edges by moving the stone or file across the cutting edges in a circular motion. Take care to maintain the original profile and angle of the cutting edges.
After sharpening, it’s important to deburr the cutting edges to remove any burrs or rough edges that may have formed during the sharpening process. Use a deburring tool or a fine-grit sharpening stone to lightly smooth out the edges.
Step 4: Testing the Reamer
After sharpening, it’s important to test the reamer to ensure that it is performing optimally. Choose a scrap piece of material similar to the one you will be working on and use the reamer to create a hole. Pay attention to the ease with which the reamer cuts through the material and the quality of the hole created.
If you notice any issues, such as a rough hole or difficulty in cutting, it may be an indication that further sharpening or adjustments are needed. In such cases, it’s best to seek professional assistance to ensure that the reamer is properly sharpened.
Step 5: Storing the Reamer
Proper storage of a reamer is essential for maintaining its sharpness and preventing any damage. After cleaning and lubricating the reamer, store it in a dry and secure place, away from moisture and extreme temperatures.
Consider using a reamer storage case or a protective sleeve to prevent any accidental damage or dulling of the cutting edges. This will also help to keep the reamer organized and easily accessible when needed.
By following these steps, you can effectively maintain and sharpen your reamer, ensuring that it performs optimally and lasts for a long time. Regular inspections and proper cleaning and lubrication are key to preventing damage, while sharpening the reamer when needed will help to achieve precise and clean cuts.


