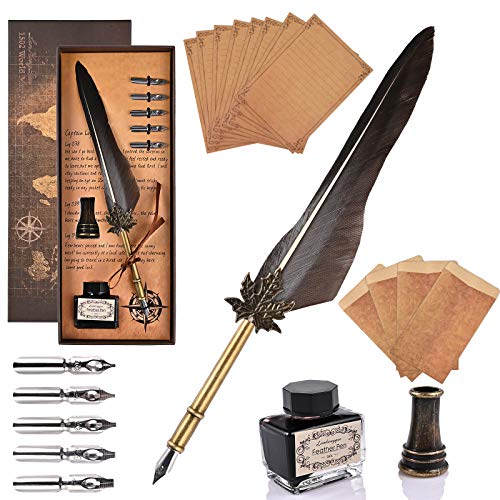
Gather the necessary materials
Making a quill pen at home is a simple and enjoyable DIY project. To begin, you’ll need a few basic materials:
- A feather
- A sharp knife or scissors
- Ink or marker
- A small container for ink
- Paper or parchment
Once you have these materials ready, you can proceed to the next steps.
Selecting the right feather
The first step in making a quill pen is to choose the right feather. Look for a large feather that has a sturdy and flexible shaft. Feathers from birds like geese, swans, or turkeys are commonly used for making quill pens. Make sure the feather is clean and free from any damage or cracks.
Preparing the feather
Once you have chosen the feather, it’s time to prepare it for use. Start by removing any soft or fluffy parts from the quill, leaving only the hard and hollow shaft. This can be done by gently plucking or cutting away the unwanted portions.
Next, use the sharp knife or scissors to create a flat writing nib at one end of the quill. This should be done by making a diagonal cut across the tip of the quill, creating a slanted surface. The size and angle of the cut can vary depending on personal preference and the desired writing style.
Ink preparation
Now that the quill pen is ready, it’s time to prepare the ink. If you have a bottle of ink or calligraphy ink, simply pour a small amount into a container suitable for dipping the quill pen.
If you don’t have ink on hand, you can also use a marker. Carefully remove the felt tip of the marker and squeeze it gently to release the ink into a small container. Make sure the ink is of a suitable consistency for writing.
Writing with the quill pen
With your quill pen and ink ready, it’s time to start writing! Dip the nib of the quill into the ink, making sure to only cover the slanted surface. Gently tap the quill on the edge of the container to remove any excess ink.
Hold the quill pen at a comfortable angle and apply light pressure to the nib while writing. Experiment with different angles and pressures to achieve the desired writing style and thickness. Keep in mind that quill pens require frequent dipping, so be sure to replenish the ink as needed.
Remember to allow the ink to dry completely before handling the paper, as quill pen ink can take longer to dry compared to conventional pens.
In conclusion, making a quill pen at home is a fun and creative project that allows you to experience the traditional art of writing. With a few basic materials and some patience, you can create a unique and authentic quill pen that adds a touch of nostalgia to your writing experience.