Why is it important to clean an oyster shucking knife?
Before diving into the steps of cleaning an oyster shucking knife, it’s essential to understand why this process is so important. Oysters are filter feeders, meaning they consume the nutrients and contaminants present in the water around them. As a result, these contaminants can accumulate on the shell, and when shucked improperly, they can come into contact with the knife. By cleaning your oyster shucking knife thoroughly after each use, you can prevent the transfer of any bacteria or contaminants to other foods or oysters.
Gathering the necessary supplies
To effectively clean an oyster shucking knife, you’ll need a few basic supplies:
- A scrub brush or toothbrush
- Hot water
- Dish soap
- Vinegar or lemon juice
- A clean cloth or towel
With these supplies on hand, you can proceed to the next steps of cleaning your oyster shucking knife.
Steps to clean an oyster shucking knife
Follow these steps to ensure your oyster shucking knife is thoroughly cleaned:
- Rinse the knife: Start by rinsing off any visible debris or oyster remnants from the knife under hot water. This initial rinse will make the following steps more effective.
- Scrub with dish soap: Apply a small amount of dish soap to the scrub brush or toothbrush, and gently scrub the blade and handle of the knife. Pay special attention to any grooves or crevices where debris may be trapped.
- Remove stubborn stains: If there are any stubborn stains or stuck-on residue, make a paste using equal parts vinegar or lemon juice and baking soda. Apply the paste to the stains and let it sit for a few minutes before scrubbing with the brush again.
- Rinse and sanitize: Once you’ve thoroughly scrubbed the knife, rinse it under hot water to remove any soap or residue. After rinsing, sanitize the knife by soaking it in a solution of one part vinegar or lemon juice to three parts hot water. Let it soak for a few minutes to kill any remaining bacteria.
- Dry and store: Finally, dry the knife thoroughly with a clean cloth or towel. Make sure all moisture is removed to prevent any rusting or damage. Once dry, store the knife in a safe place, away from other utensils to prevent any accidents.
Additional tips and precautions
Here are a few additional tips and precautions to keep in mind while cleaning your oyster shucking knife:
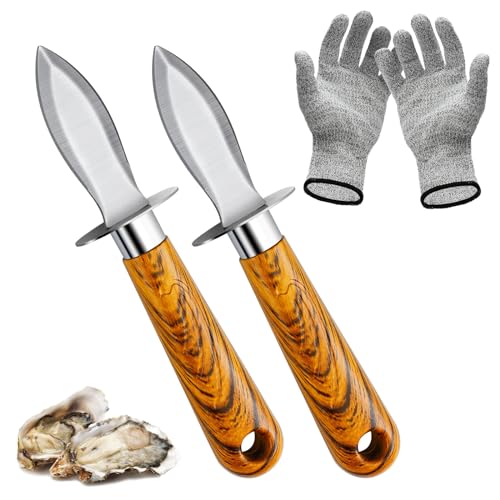
- Always exercise caution when handling sharp objects like an oyster shucking knife. Use protective gloves if necessary to prevent any accidents.
- If your knife has a wooden handle, avoid soaking it for an extended period as it can lead to warping or splitting.
- For stubborn stains or odors, try soaking the knife in a mixture of hydrogen peroxide and water overnight before proceeding with the cleaning steps.
Regular maintenance and inspection
Regular maintenance and inspection are crucial to ensure your oyster shucking knife remains in good condition. After each use, inspect the blade and handle for any signs of damage or deterioration. If you notice any chips, cracks, or loose handles, it’s essential to replace or repair the knife before using it again. Additionally, maintaining a sharp blade will make shucking easier and reduce the likelihood of accidents. For regular maintenance, use a sharpening stone or honing rod to keep the blade sharp and ready for use.