Introduction
Stair gates are a popular safety device used to prevent young children and pets from accessing stairs, thereby reducing the risk of accidents. Many parents wonder about the installation process and whether stair gates are easy to install. In this article, we will explore the ease of installing stair gates and provide helpful tips and guidance to make the installation process a breeze.
Types of Stair Gates
Before diving into the installation process, it’s important to understand that there are different types of stair gates available in the market. The two main types are pressure-mounted gates and hardware-mounted gates.
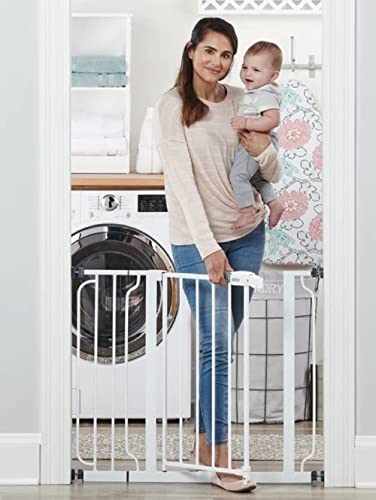
Pressure-mounted gates are easy to install and do not require any tools or drilling. These gates use pressure to stay in place, making them suitable for doorways and other areas where drilling into walls is not desired. However, it’s worth noting that pressure-mounted gates may not be as sturdy as hardware-mounted gates.
On the other hand, hardware-mounted gates are more secure and durable. These gates are typically installed with screws and brackets, making them a permanent fixture in the home. Hardware-mounted gates are commonly used for staircases, as they provide an extra level of safety and stability.
Ease of Installation
The ease of installing a stair gate largely depends on the type of gate and the specific installation requirements. While pressure-mounted gates are generally easier and quicker to install, hardware-mounted gates may require more time and effort.
For pressure-mounted gates, the installation process usually involves extending the gate to fit the desired opening, then tightening the pressure knobs until the gate is secure. The gate should be placed at the correct height to prevent climbing over, and it’s essential to follow the manufacturer’s instructions for proper installation.
Hardware-mounted gates, on the other hand, require more steps and tools. The first step is to measure and mark the placement of the gate brackets on the walls or banisters. Next, holes may need to be drilled to secure the brackets. Once the brackets are installed, the gate can be attached and adjusted for a proper fit. It’s crucial to ensure that the gate is securely mounted and that all screws are tightened to prevent accidents.
Tips for Easy Installation
Installing a stair gate can be made easier by following a few simple tips:
4.1 Read the Instructions
Before starting the installation process, thoroughly read and understand the manufacturer’s instructions. Each gate may have specific requirements and guidelines that need to be followed for safe installation.
4.2 Gather the Required Tools
If you’re installing a hardware-mounted gate, make sure you have all the necessary tools on hand. Common tools include a drill, screws, a measuring tape, and a level. Having the tools ready before starting the installation will save you time and frustration.
4.3 Measure Twice, Install Once
Ensure that you accurately measure the width of the opening where the gate will be installed. Taking precise measurements will help you choose the right gate size and prevent any issues during the installation process.
4.4 Test the Gate
Once the gate is installed, test it thoroughly to ensure it is secure and functions properly. Check that the gate opens and closes smoothly and that it locks securely. Regularly inspect the gate for any signs of wear and tear or loose parts.
Conclusion
While the ease of installing a stair gate may vary depending on the type of gate and installation requirements, following the manufacturer’s instructions and taking necessary precautions can make the process easier and ensure the gate is properly installed. Stair gates are an essential safety measure, and their installation is a worthwhile investment in protecting young children and pets from potential accidents on staircases.